We’ve all seen it: the beautifully painted patio that looks stunning for one season, only to become a peeling, flaky mess the next. The dream of a fresh outdoor space can quickly turn into a frustrating chore. If you’ve been hesitant about painting a cement patio, you’re right to be cautious. Most projects fail, but yours won’t.
The secret to a durable, long-lasting finish isn’t found in a magic can of paint. It’s a systematic, inspector-approved process that prioritizes preparation over all else.
This guide will walk you through that exact system. By following these steps, you can boost your home’s curb appeal, protect your concrete from the elements, and add real value to your property without having to redo it all next year.
3 Keys to Pro-Level Cement Patio Painting
Before you buy a single supply, you need to assess your canvas. Seeing your patio through an inspector’s eyes is the most critical step, and it’s the one most people skip. Here’s what to look for.
The Moisture Test (The #1 Enemy)
Concrete is porous and can pull moisture up from the ground. Cracks also create entry points for moisture. Painting over damp concrete is a recipe for failure, as the water vapor will cause the paint to peel right off. To check for moisture, tape a 2×2-foot plastic square to the concrete. Seal all four edges with duct tape and leave it for 24 hours. When you pull it up, is the underside of the plastic wet? If so, you have a moisture issue that must be addressed before painting.
The Crack & Damage Check
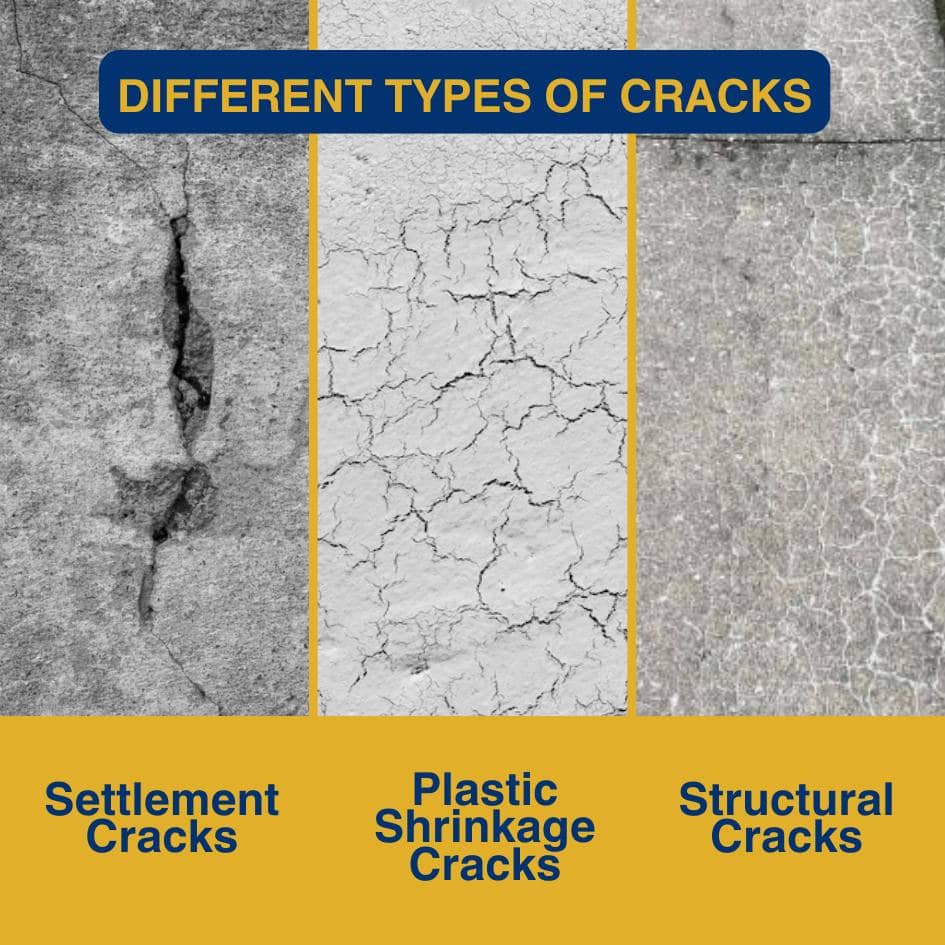
Look closely at the surface. Are there hairline cracks? These are usually just cosmetic. But if you see larger cracks (wider than a credit card), uneven sections, or significant crumbling, these could be red flags. These bigger issues often mean the slab is struggling to support its weight. When concrete is poured, its strength relies on proper ground preparation and its ability to handle compression. If it starts to crack or sink, it’s a sign that it can no longer support the load and needs a professional look before being painted.
The Porosity Test
Is your patio already sealed? Sprinkle a few drops of water on the surface. If the water beads up, the concrete is sealed and will not absorb primer or paint. Any existing sealer must be chemically stripped or mechanically ground off before you can proceed. If the water soaks in and darkens the concrete, you’re good to go.
image inspo: https://www.jimsrenderingsydney.com.au/different-crack-types-exploring-varieties-causes-and-solutions/ (Different Crack Types)

Prepare the Surface for a Flawless Finish
Before you even think about paint or primer, the success of your entire project depends on this critical first step. A thoroughly cleaned and prepared surface is the foundation for a durable, professional-looking finish. This isn’t just about appearances; it’s about creating the perfect canvas for your primer and paint to adhere to for years to come.
Secret #1: The Power of a Flawless Clean
You are not just wiping away dirt; you are creating a perfectly clean surface that primer can grip onto for years to come. A quick pass with a hose is not enough.
Start by sweeping away all leaves and debris. Then, tackle stains with a concrete degreaser. For overall grime, scrub the entire patio with a stiff-bristled brush and a concrete-safe cleaner. After scrubbing, rinse the patio thoroughly until the water runs completely clear. Any leftover chemical residue will interfere with paint adhesion and sabotage your hard work.
Secret #2: Smart Repairs for a Seamless Finish
A perfect paint job cannot hide a flawed surface. Fixing small imperfections now is the key to a professional-looking result.
Use a flexible concrete crack filler or an epoxy-based patching compound to fill hairline cracks and small chips. Follow the product’s directions carefully, especially the curing time. It can be tempting to rush this step, but patience is essential. A $20 tube of concrete filler is the best investment you can make for a smooth, durable finish that won’t show cracks a few months down the road.
Secret #3: Never, Ever Skip the Right Primer
Think of primer as the glue that bonds your paint to the concrete. It is not an optional step. Skipping primer is planning for failure, especially for a demanding project like painting a cement patio, as it performs two vital jobs.
First, it creates a powerful bond between the concrete and the topcoat. Second, it seals the porous surface, preventing the concrete from “drinking” your expensive paint. This means you’ll use less paint and save money.
- Inspector’s Tip: Use a bonding primer for dense or previously painted concrete. If your moisture test showed slight dampness, use a waterproofing or sealing primer to help block minor moisture from below.
image inspo: https://wethedreamers.com/blog/how-to-stencil-a-faux-tile-concrete-patio

Secret #4: Get Creative With Your Design
Once you’ve built a solid, well-prepped foundation, you can get creative. This is where the fun side of painting a cement patio comes to life, allowing you to turn a plain slab into a true design feature. Your hard work in preparation ensures these beautiful designs will last.
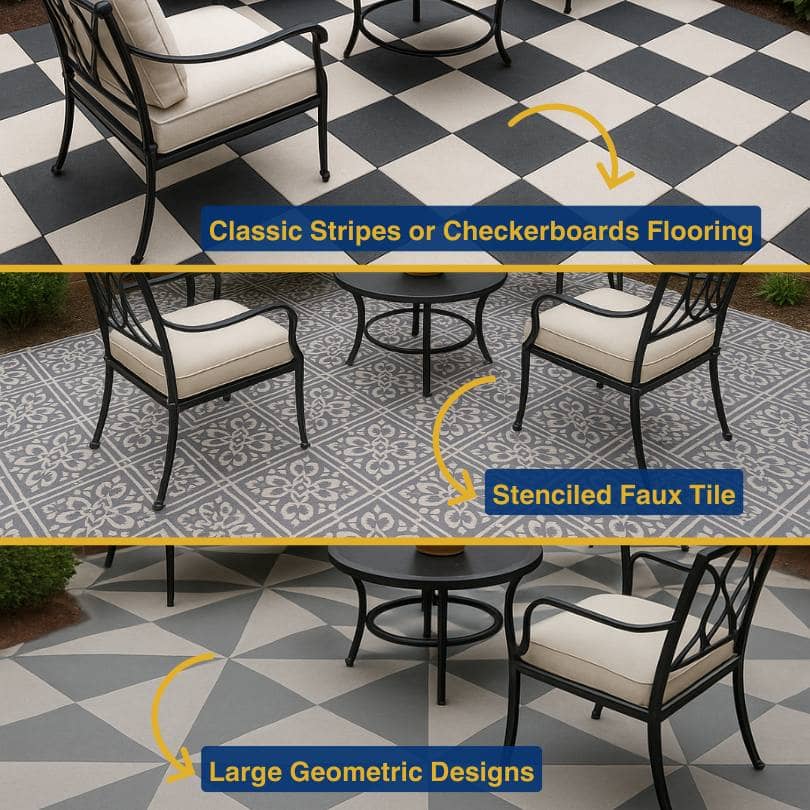
- Classic stripes or checkerboards are a timeless choice that’s easy to execute with painter’s tape. You can go bold with high-contrast colors like black and white or subtle with two shades of gray for a more modern look.
- Stenciled faux tile offers a way to achieve the Mediterranean or Moroccan tile aesthetic without the high cost. Using concrete stencils, you can create beautiful and detailed patterns that replicate the look of pricey cement tiles.
- Large geometric designs, such as bold triangles, interlocking shapes, or a pinwheel motif, can create a striking focal point and make a small patio appear more spacious and dynamic.
Secret #5: Choosing Your Armor: The Best Paint
Now that the critical prep work is done, you can choose your paint. For a project like painting a cement patio, you need a product designed to withstand foot traffic, furniture, and weather.
- Acrylic Latex Porch & Floor Paint: This is a great choice for most patios. It’s durable, flexible enough to handle temperature changes, and cleans up easily with water.
- 1-Part Epoxy Paint: This option offers superior durability and better resistance to chemicals and abrasion. It’s a fantastic upgrade for high-traffic areas.
Look for a paint specifically labeled “Porch & Floor” or “Patio” and ensure it offers UV protection to prevent fading. For the best results, apply two thin coats with a 3/8-inch nap roller instead of one thick coat. And always check the weather; work on a day that is not too hot or sunny, with no rain in the forecast for at least 48 hours.
image: https://allyourlandcare.com/4-patio-drainage-issues-correct/ (drainage)

Other Recommended Home Maintenance
Your patio’s health is directly linked to the areas around it. A beautiful patio with poor drainage nearby can lead to foundation problems. While you’re focused on this area, take a moment to:
- Check Gutters & Downspouts: Make sure they are clean and directing water several feet away from your patio and your home’s foundation.
- Assess the Grading: The soil and landscaping around your patio should gently slope away from your house to promote proper drainage.
When to Call a Professional
A DIY approach is great, but sometimes painting a cement patio requires an expert. It’s time to call for help if your pre-painting inspection revealed:
- Large, uneven cracks that run deep into the concrete.
- A patio that has noticeably sunk or is sloping toward your house.
- Persistent moisture issues or major efflorescence that keeps returning.
These can be signs of underlying soil, drainage, or foundation issues. Before you spend time and money painting over a potential problem, a professional home inspection can give you a clear picture of your home’s condition and protect your long-term investment.
Conclusion
A beautiful, durable painted patio is not the result of luck or secrets. It’s the result of a system: Inspect, Prep, Prime, and Protect. By taking the time to follow these professional steps, you can create an outdoor space that you and your family will enjoy for years. That same moisture that can ruin your project of painting a cement patio can also be a sign of issues that affect your home’s interior health. If your inspection revealed significant moisture or you are concerned about what might be happening behind your walls, a professional mold inspection provides clarity and peace of mind.
If you have any questions or need an inspection, don’t hesitate to reach out to our team! Enjoy your beautiful, long-lasting patio.

